Introduction
In this step-by-step tutorial, we are going to see how to write and execute automated acceptance tests for an Android application. To do this, we are going to use these tools:
- HipTest, our test management platform in the cloud, to write and export our tests cases as executable files
-
Calabash, and more precisely, the
calabash-android gem, to interact with the GUI of our application and to automate the tests steps we will write in HipTest
In this tutorial, I will take the Wikipedia Android application as an example to write my acceptance tests. I thought it would be more relevant to use a real application rather than a simple one like a calculator or a random sample, because it would be closer to your own real-life case, with the same difficulties you will -surely- encounter when automating your own tests. Furthermore, the source code of this application is open-source (get it here) and it's nearly indispensable to have an access to the source code when you have to simulate the users actions on your application.
Prerequisites
Before going further, you will need to setup the Android SDK (if you are using your development environment, it should be already done) and the calabash-android gem on your machine.
Install and configure the Android SDK
I am not going to describe here the full installation process of the Android SDK. It has been already done all over the Internet, including obviously the official Android SDK website, so just follow this link.
However, to make calabash-android work, you'll have to define the ANDROID_HOME variable in your system.
For MacOSX and Linux users
Add the following lines in your .bash_profile file:
export ANDROID_HOME=/YOUR_PATH_TO/android-sdkexport PATH=$ANDROID_HOME/platform-tools:$PATH
export PATH=$ANDROID_HOME/tools:$PATH
(don't forget to run the "source" command on your ".bash_profile" file to take the modifications into account)
For Windows users
Type the following lines in the Windows console:
set ANDROID_HOME=C:\YOUR_PATH_TO\android-sdk-windowsset PATH=%PATH%;%ANDROID_HOME%\tools;%ANDROID_HOME%\platform-tools
Install the calabash-android gem
You need to have Ruby installed on your machine. Just type:
gem install calabash-android
in your terminal. (for more details about this step, check the installation page on the calabash-android Github repository page)
We are now ready to write and run our first automated acceptance test!
Executing my first feature
Before all, we'll need to sign our packaged application file (.apk file) and build a test server using the same keystore.
First, run:
calabash-android resign /path_your_app/app_name.apk
which will use your default keystore to resign your app. Then, run:
calabash-android build /path_your_app/app_name.apk
We are now ready to write our first test and make sure that our installation is completed.
Generate the files skeleton
The calabash-android gem provides a command to automatically generate a standard Cucumber project sample. To do this, run the following command:
calabash-android gen
This will generate these files in your current folder:
features |
|_step_definitions
| |_calabash_steps.rb
|
|_support
| |_app_installation_hooks.rb
| |_app_life_cycle_hooks.rb
| |_env.rb
| |_hooks.rb
|
|_my_first.feature
- The "step definitions" directory contains the implementation of the custom steps we will create in the last part of this tutorial
- The "support" directory contains all the custom configuration of the execution of your test suite
- The "my_first.feature" file contains an auto-generated Cucumber feature that we are about to modify
Run a simple feature
You can execute your tests either on the Android emulator that comes with the SDK or directly on a plugged Android device.
On the Android emulator
Create and start a new virtual device (see the procedure here)
On a plugged device
Make sure you have activated the "USB Debugging mode" and plug your phone. Run the "adb devices" command and check that your device appears in the list
Once your emulator or device is ready, run the following command:
calabash-android run /path_to_your_app/app.apk --verbose
This command will install your application on the device and run every tests contained in the "features" directory.
Giving the content of the feature file generated by calabash-android, the test run should fail.

We now have everything we need to automate tests of an Android application. And that's what we are going to do in the next part of this tutorial.

Using Hiptest to write and execute acceptance tests
As I said in the introduction, I'll write acceptance tests for the Wikipedia Mobile application as an example. Nevertheless, I encourage you to write your tests for your own application.
To do this, we are going to follow these steps:
- write test scenarios in Hiptest
- get the Cucumber features files corresponding to our test scenarios using hiptest-publisher
- implement the custom steps
Write test scenarios in Hiptest
When you'll open the Wikipedia Mobile application for the first time, you'll see this screen:
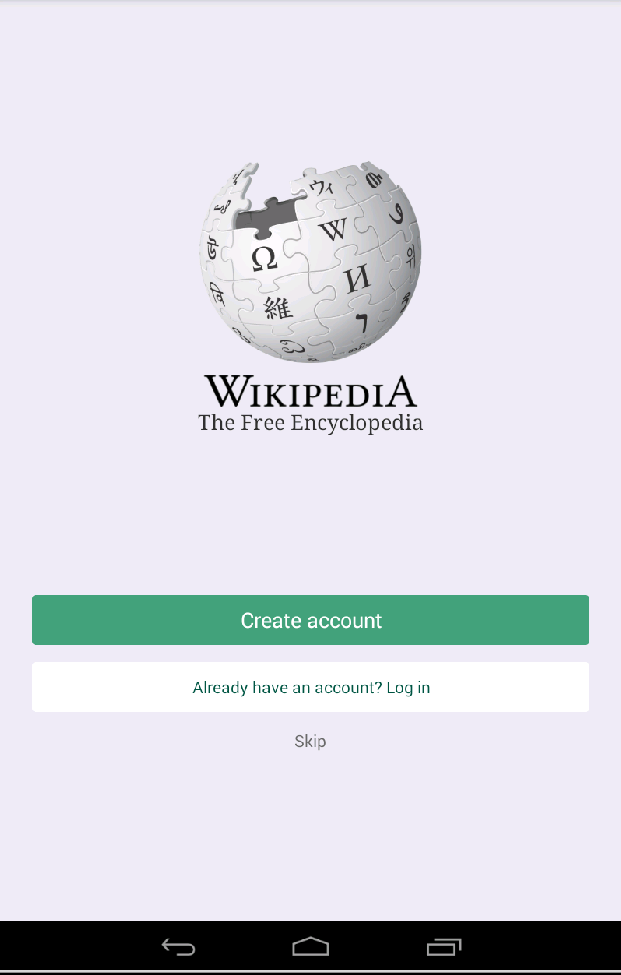
Of course, you don't need an account to use Wikipedia and that's the reason of the presence of the "Skip" button.
So, a feature to test could be: "even though you are a non-registered user, you can access to our unlimited knowledge base".
Let's translate it into an acceptance test scenario in Hiptest:
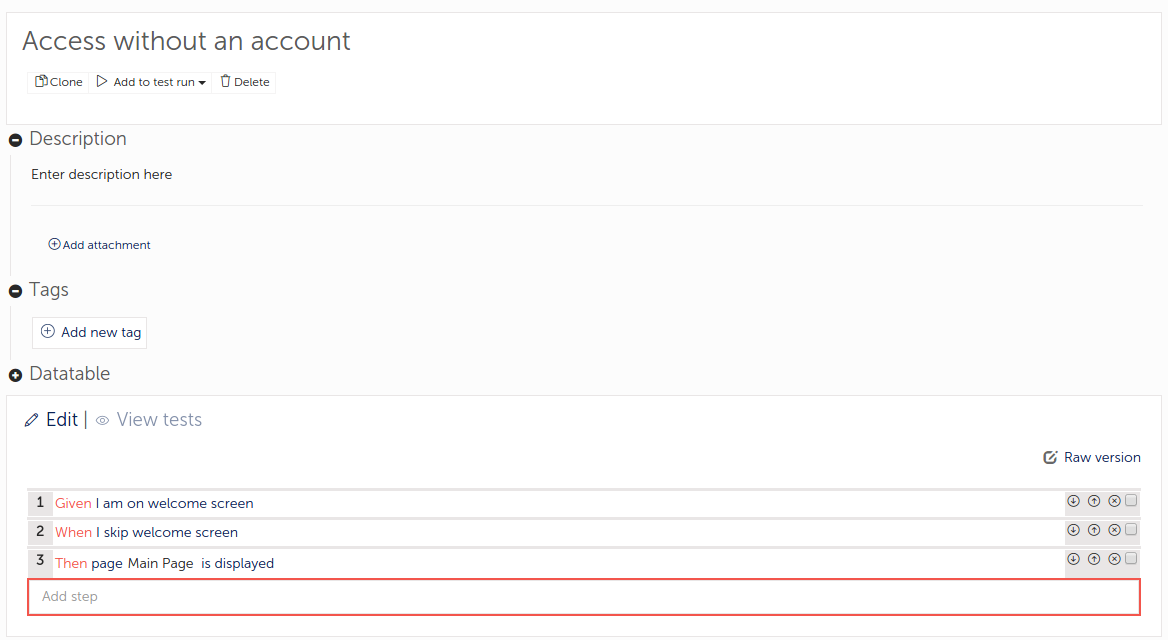
As you can see, I wrote my scenario using the Gherkin syntax that Hiptest support, so I'll get a perfect mapping when exporting my Hiptest as a bunch of Cucumber features files.
For more details about writing your tests with the Gherkin syntax in Hiptest, take a look at this page.
Get the executable Cucumber features files
To export the test scenarios as executable Cucumber scripts, we will use the hiptest-publisher gem.
If you're not familiar with it, or if you need to install or configure it, I invite you to read
this page of our documentation.
First, get the hiptest-publisher configuration file for your project directly in the "Automation" panel of your Hiptest project
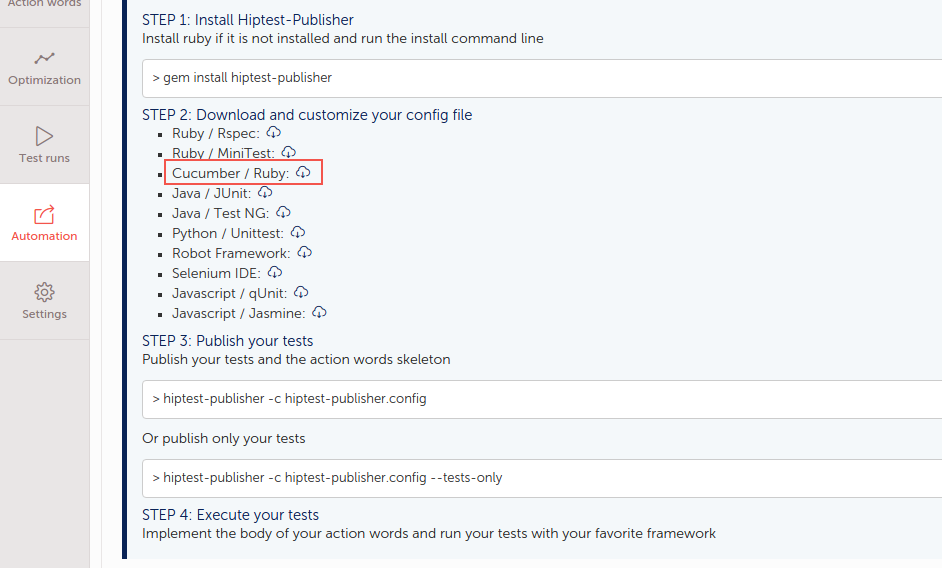
And put this file at the root of the "features" directory of your workspace:
features |
|_step_definitions
| |_calabash_steps.rb
|
|_support
| |_app_installation_hooks.rb
| |_app_life_cycle_hooks.rb
| |_env.rb
| |_hooks.rb
|
|_hiptest-publisher.config
|_my_first.feature
You can now use the hiptest-publisher command line to get your features files:
hiptest-publisher -c hiptest-publisher.config
If everything goes well, you should get a file for each test scenario you defined in your Hiptest project:
features|
|_step_definitions
| |_calabash_steps.rb
|
|_support
| |_app_installation_hooks.rb
| |_app_life_cycle_hooks.rb
| |_env.rb
| |_hooks.rb
|
|_Access_without_an_account.feature
|
|_hiptest-publisher.config
|_my_first.feature
|
|_step_definitions.rb
If you open the "step_definitions.rb" file (that you may move into the "step_definitions" directory), you will see something like this:
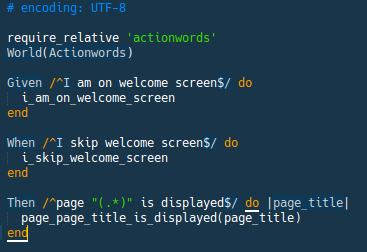
It's where are defined all the custom steps we use in our features files and they match the actionwords used in the Hiptest project. As you can see, all of them are just calling a Ruby method with the same normalized name.
Those methods are not defined yet, so you'll just get an error message if you try to execute your tests now. To generate them, we will have to use the hiptest-publisher again.
To do so, run the command:
hiptest-publisher -c hiptest-publisher.config --language=ruby --only=actionwords
You will get the "actionwords.rb" file. If you open it, you will see the skeleton of the methods that are called by the custom steps of our project. That's where we are going to write the code to interact with the application under test and our assertions.

Implementing the custom steps
Aside from predefined steps that we are not going to use here (because of their too limited potential of use in a real life project), calabash-android provides a Ruby API to implement your own custom steps. You can find a documentation of this API at this address and at this one, for the most recent functions.
[TL;DR]
If you just want to test quickly your installation, you can clone our hiptest-calabash-sample repository which includes three acceptance tests on the Wikipedia Mobile application. Just follow this link.
[/TL;DR]
Let's open our "Access without an account" feature file
Feature: Access without an account Scenario: Access without an account
Given I am on welcome screen
When I skip welcome screen
Then page "Main Page" is displayed
We have to implement the three steps the scenario contains in the "actionwords.rb" file:
def i_am_on_welcome_screenend
def i_skip_welcome_screen
end
def page_page_title_is_displayed(page_title = "")
end
The "i_am_on_welcome_screen" function is pretty simple. All we have to do is to make sure that the elements that constitute the welcome screen are displayed.
The calabash-android API includes a bunch of functions dedicated to waiting. In our context, we can use the "wait_for_element_exists" method to implement our first step:
def i_am_on_welcome_screen wait_for_element_exists("android.widget.Button marked:'Create account'")
wait_for_element_exists("android.widget.Button marked:'Already have an account? Log in'")
wait_for_text('Skip')
end
At the execution, the code will wait and check if the signup, login and skip buttons are displayed on the screen.
The arguments of the "wait_for_element_exists" function (as every other functions of the calabash-android API that target a GUI element) is written with the Calabash query syntax.
Furthermore, here are a few tips to make the writing of your queries easier:
- use the uiautomatorviewer tool packed with the Android SDK (/path_to_android_sdk/tools/uiautomatorview). For more informations about its use, have a look to this blog post.
- use the Google Chrome inspector to inspect the Webviews you might use in your application (see the documentation)
Now, let's define the "i_skip_welcome_screen" function. Unlike the previous step, we have to directly interact with a GUI element. Nothing's more easier with the Calabash API:
def i_skip_welcome_screen tap_when_element_exists("* marked:'Skip'")
end
The function will wait until the GUI element exists before trying to interact with it, in contrary to the more simple 'touch' function, which can cause your test fails because of asynchronism problem (the test runner try to touch the button before this one appears in the GUI).
Finally, let's code our last step. In this one, we want to check if the current open page is the one those we pass the title as an argument of the "page_page_title_is_displayed" function.
def page_page_title_is_displayed(page_title = "") wait_for_element_exists("org.wikipedia.views.ObservableWebView css:'h1.section_heading'")
title_elt = query("org.wikipedia.views.ObservableWebView css:'h1.section_heading'").first
expect(title_elt['textContent']).to eq page_title
end
You should now be familiar with the two first lines that use the Calabash API.
However, the last line that checks if the current page title is equal to the value of the "page_title" argument does not use the assertions methods of Calabash, but the RSpec (a powerful test DSL for Ruby) syntax. If you want to do the same, just install the rspec-expectations gem.
Now, run the execution of your test by using the calabash-android 'run' command as seen above. You should see the test played on the emulator or on your device and something like this in your console when the execution is done:
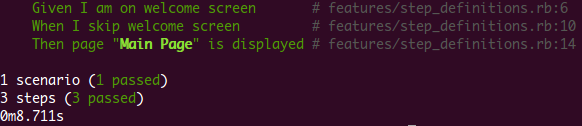
Congrats! You just write and run your first automated acceptance test on your Android application! *\o/*
Going further
I tried to keep this tutorial as simple as possible to provide you a quick way to use Calabash in your Hiptest workflow and you'll surely want to go deeper into the vast subject of mobile testing automation.
A first reading I highly recommend you is our "Automate your tests" section of the Hiptest documentation, which will teach you the best practices to structure your project before automating it and integrating it in a continuous integration process.
In this blog post, I only talked about testing Android application. Maybe you would want to do the same for iOS application. In this case, the process would be the same, except that you would have to use the calabash-ios gem which implied some light changes in the command lines and in the Ruby API.
Similarly, if you want to run your tests on multiple devices with multiple platforms, you will have to mind about the structure of your automation code to keep it easily maintainable. A common pattern for this use case is to apply the Page-Object Pattern, a practice coming from Web testing but which fits perfectly with mobile testing. You will find an excellent guide in the Xamarin documentation base.