Cucumber Ruby 2.1 introduces the new Events API — a simple way to find out what's happening while Cucumber runs your features. Events are read-only and simplify the process of writing formatters, and other output tools.
I'll illustrate how to use the API with a worked example that streams Cucumber test results to a browser in real-time.
Can you give me an example?
As much as we love our console applications, we can get a much richer experience in a web browser. How could we get Cucumber to push information into a nice web UI, without losing the rich information available with the built-in formatters?
Let's build a super-simple example using the Events API that uses a websocket to update a web page while cucumber is running.
There's lots of ways to run a websocket server – a favourite of mine is to use websocketd because it's super simple. Give it an executable that reads STDIN and write STDOUT and you're done!
For our very simple websocket reporter we are going to use a UNIX named pipe to push information out of our cucumber process. To get these events out onto a websocket we need a shell command that reads from a named pipe and echos back onto STDOUT.
subscriber.sh
#!/bin/bash

fifo_name="events";

[ -p $fifo_name ] || mkfifo $fifo_name;

while true
do
  if read line <$fifo_name; then
    echo $line
  fi
done
Make sure the script is executable with chmod +x subscriber.sh.
When you run it, it will create an events named pipe if one doesn't exist already, then wait until there is data on the pipe for it to read. We can see it in action by putting some data on to the pipe: echo "hello, world" > events.
Writing Cucumber Events to the pipe
Let's start by asking cucumber to write messages to the pipe. Add the following to features/support/env.rb
EVENT_PIPE = "events"
unless File.exist?(EVENT_PIPE)
  `mkfifo #{EVENT_PIPE}`
end

publisher = File.open(EVENT_PIPE, "w+")
publisher.sync = true
publisher.puts "started"

at_exit {
  publisher.puts "done"
  publisher.close
}
This doesn't use the Events API yet, but we've got the plumbing in place now to write to the same named pipe as subscriber.sh will read from. With subscriber.sh up and running, you should be able to run cucumber and see started and done output to the terminal by subscriber.sh.
For our simple web-browser cucumber reporter we want to show each step that cucumber runs, and its result. We want cucumber to tell us when it starts to execute, when it starts to run each step, when it finishes a step (and what the result was) and when it's finished executing.
We'll send some formatted JSON that give us some information about the events:
{
  "event": "event_name",
  "data": {} //information about the event
}
We can modify features/support/env.rb to give us the start and end events:
require 'json'

EVENT_PIPE = "events"
unless File.exist?(EVENT_PIPE)
  `mkfifo #{EVENT_PIPE}`
end

publisher = File.open(EVENT_PIPE, "w+")
publisher.sync = true
publisher.puts({event: "started", data: {}}.to_json)

at_exit {
  publisher.puts({event: "done", data: {}}.to_json)
  publisher.close
}
The Cucumber Events API gives us access to what's going on inside Cucumber while it's running our features. We want to know when a step is going to be run, and what happened when it finished. Cucumber provides us the BeforeTestStep and AfterTestStep events. To hear about these events we can use the cucumber AfterConfiguration hook to get access to the current config, and add handlers for specific events with the on_event method:
AfterConfiguration do |config|
  config.on_event :before_test_step do |event|
  end

  config.on_event :after_test_step do |event|
  end
end
Putting this all together we can modify features/support/env.rb to push these events out onto our named pipe too:
require 'json'

EVENT_PIPE = "events"
unless File.exist?(EVENT_PIPE)
  `mkfifo #{EVENT_PIPE}`
end

publisher = File.open(EVENT_PIPE, "w+")
publisher.sync = true

AfterConfiguration do |config|
  publisher.puts({event: "started", data: {}}.to_json)

  config.on_event :before_test_step do |event|
    publisher.puts(
      {
        event: "before_test_step",
        data: {}
      }.to_json
    )
  end

  config.on_event :after_test_step do |event|
    publisher.puts(
      {
        event: "after_test_step",
        data: { result: event.result.to_s }
      }.to_json
    )
  end
end

at_exit {
  publisher.puts({event: "done", data: {}}.to_json)
  publisher.close
}
Now if you run Cucumber, with subscriber.sh up and running you should see something like:
$ ./subscriber.sh
{"event":"started","data":{}}
{"event":"before_test_step","data":{}}
{"event":"after_test_step","data":{"result":"✓"}}
{"event":"before_test_step","data":{}}
{"event":"after_test_step","data":{"result":"✓"}}
{"event":"before_test_step","data":{}}
{"event":"after_test_step","data":{"result":"✓"}}
{"event":"before_test_step","data":{}}
{"event":"after_test_step","data":{"result":"✗"}}
{"event":"before_test_step","data":{}}
{"event":"after_test_step","data":{"result":"-"}}
{"event":"done","data":{}}
Hooking up a WebSocket
Great! We've got Cucumber sending our events. We now want to get these events pushed into a web-page using a websocket.
websocketd lets us hook our subscriber.sh command up to a websocket. Let's have a look at what happens using websocketd's devconsole mode:
$ websocketd --port=8080 --devconsole ./subscriber.sh
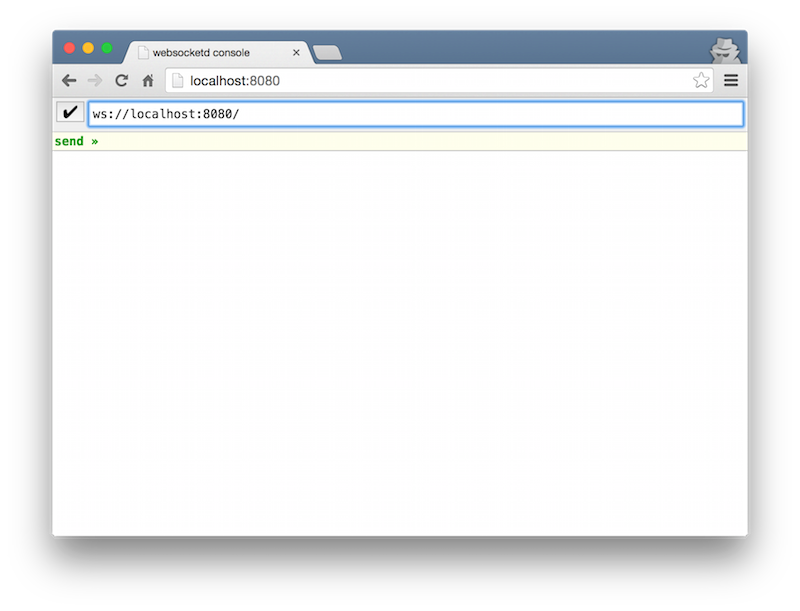
Then point your browser to [http://localhost:8080] and you should see:

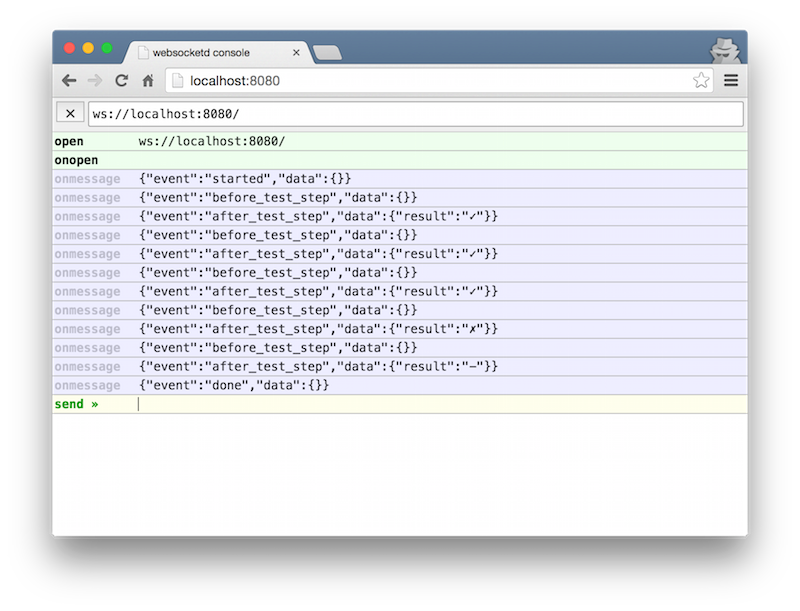
Clicking the little "✔" in the top left will connect the websocketd's dev console to the running socket. Now if you echo some text on to the named pipe, you will see it appear in the console on the web browser. Now running Cucumber again, you should see something like this in the web browser:

WebSocket Cucumber
Finishing everything up, lets create a simple web-page that uses the websocket to get information from Cucumber as it's running. Save this as index.html:
<!DOCTYPE html>
<html>
<head>
</head>
<body>
<h1>Cucumber Runner</h1>
<p id="status">disconnected</p>
<div id="runner"></div>
<script>
  // helper function: log message to screen
  function stepStarted() {
    var runner = document.getElementById("runner");
    var resultNode = document.createElement("span");
    resultNode.textContent = "*";
    runner.appendChild(resultNode);
  }

  function stepResult(result) {
    var resultNode = document.getElementById("runner").lastElementChild;
    resultNode.textContent = result;
  }

  function clearRunner() {
    document.getElementById('runner').innerHTML = "";
  }

  function statusWaiting() {
    document.getElementById('status').textContent = "waiting";
  }

  function statusRunning() {
    document.getElementById('status').textContent = "running";
  }

  function statusDisconnected() {
      document.getElementById('status').textContent = "disconnected";
    }

  function done() {
    statusWaiting();
  }

  var CucumberSocket = function() {
    var ws = new WebSocket('ws://localhost:8080/');
    var callbacks = {};

    this.on = function(event_name, callback){
      callbacks[event_name] = callback;
      return this;
    }

    var dispatch = function(event_name, message){
      var callback = callbacks[event_name];
      if(typeof callback == 'undefined') return;
      callback(message);
    }

    ws.onmessage = function(event){
      var json = JSON.parse(event.data)
      dispatch(json.event, json.data)
    }

    ws.onclose = function(){dispatch('close',null)}
    ws.onopen = function(){dispatch('open',null)}
  };

  var cucumber = new CucumberSocket();

  cucumber.on('open', statusWaiting);

  cucumber.on('close', statusDisconnected);

  cucumber.on('started', function() {
      statusRunning();
      clearRunner();
  });

  cucumber.on('before_test_step', function(data) {
    stepStarted();
  });

  cucumber.on('after_test_step', function(data) {
    stepResult(data.result);
  });

  cucumber.on('done', function() {
    statusWaiting();
  })
</script>
</body>
</html>
Using websocketd's static site server we can get our little web page up and running: websocketd --port=8080 --staticdir=. ./subscriber.sh and open http://localhost:8080. Now running Cucumber should show you progress in the web page!

What events are available?
Cucumber 2 introduced a new model for executing a set of features. Each scenario is now compiled into a suite of Test Cases, each made up of Test Steps. Test Steps include Before and After hooks. Cucumber fires the following 5 events based on that model.
What can I use it for?
The Events API is there for getting information out of Cucumber. It's going to be the best way to write new formatters in future — the old formatter API will be removed in Cucumber 3.0. If you're looking for a way to contribute to Cucumber then rewriting some of the old formatters to use the new events API would be a tremendous help.
Any questions please come and join us on our gitter channel or the mailing list. All the code for this blog post is available here.
This was post was originally published
here.