The Hiptest API allows you to build integration with virtually anything.
It is still young and new features are constantly added but you may already get great benefits from it.
In this tutorial you will have a first look on how to get started before using it to report statuses of your Hiptest test runs on a dashboard.
Pre-requisites for this tutorial
To fully understand this tutorial it is better to have some basic knowledge of HTTP requests, and eventually a tool like CURL to test requests to the API.
For the dashboard part smashing will be used. To test it by yourself, you will need Ruby installed and ready to go on your computer. If you are not a Ruby developer, don't worry: there is very little code and it is really easy to read and to understand.
Presentation of the API
Hiptest API is RESTful and follows the {json:api} specification. Documentation is available at api-doc.hiptest.com.
Authentication
Before anything else you need to sign into Hiptest and generate your API credentials. These credentials will be used to authenticate your API requests. API access is open for all paying plans and open source subscription. If you are in a free plan and want access to the API, feel free to contact Hiptest support and we will find a solution for you.
Generate credentials in Hiptest
You can easily generate your credentials on Hiptest. Sign into your account
then go to your profile page. Click the Generate new API credentials button.
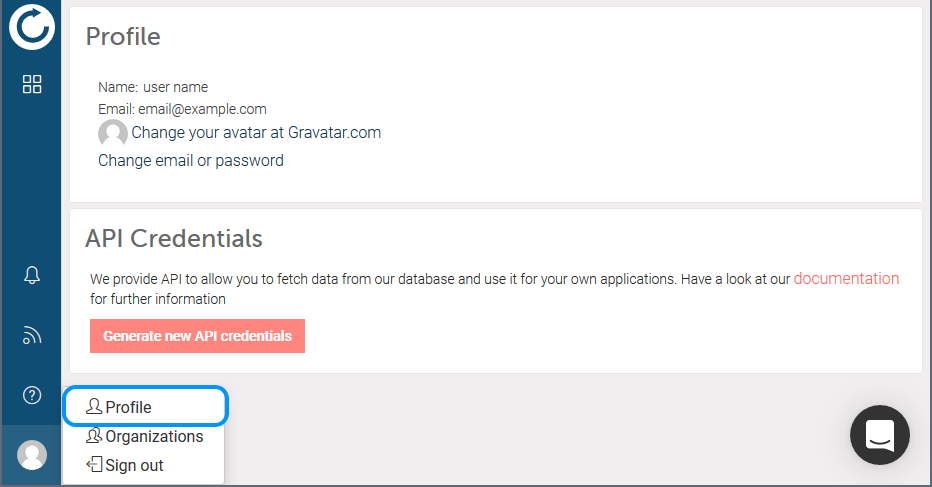
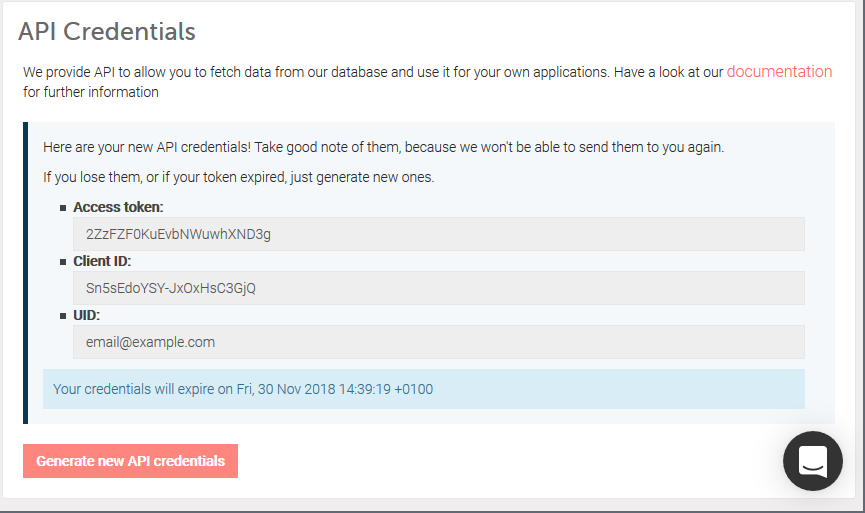
Sign in and generate credentials using Hiptest API
It is also possible to sign in and generate API credentials using the API. Post your email address and your password to app.hiptest.com/api/auth/sign_in as described below:
POST https://app.hiptest.com/api/auth/sign_in HTTP/1.1Content-Type: application/json
{
"email": "your_email_address@example.com",
"password": "your-password"
}
An Access-Token, Client and UID will then be part of the HTTP response headers.
To give it a try you can copy/paste the following command into your terminal. Just use your email address and password instead of your_email_address@example.com and your-password:
curl --header 'Content-Type: application/json' --data '{ "email": "your_email_address@example.com", "password": "your-password"}' --dump-header - https://app.hiptest.com/api/auth/sign_in
On Windows you can try the following PowerShell command:
(Invoke-WebRequest -Method Post -Uri 'https://app.hiptest.com/api/auth/sign_in' -Body '{"email": "your_email_address@example.com", "password": "your-password"}' -Headers @{'Content-Type' = 'application/json'}).Headers
Both commands should provide an output similar to the following:
Transfer-Encoding: chunkedConnection: keep-alive
X-Request-ID: 76af79ac-bc67-4bd8-ba62-5ecc9d76f0a3
X-Frame-Options: SAMEORIGIN
X-XSS-Protection: 1; mode=block
X-Content-Type-Options: nosniff
access-token: VTyqr_xxx_xxx0KH-YrbQQ
token-type: Bearer
client: cHhNuwROzt_xxxxxsaTPw
expiry: 1543397543
uid: you_email_address@example.com
ETag: W/"3cc40a7a162c1c625b5b826c6fd2d3f8"
Cache-Control: max-age=0, private, must-revalidate
X-Request-Id: 76af79ac-bc67-4bd8-ba62-5ecc9d76f0a3
X-Runtime: 0.390018
Strict-Transport-Security: max-age=31536000
Vary: Accept-Encoding
The interesting values here are:
access-token: VTyqr_xxx_xxx0KH-YrbQQclient: cHhNuwROzt_xxxxxsaTPw
uid: your_email_address@example.com
Final notice about the credentials
If you sign into Hiptest using GitHub or Google and don't have a password, sign out and follow the process to reset your password. That way you will be able to create a password for your account in addition to GitHub or Google.
Your access token is valid for one year. After this period it will be expired and you will have to generate a new one. More information is available in the documentation.

Requesting the API
Now that you have your API credentials, it is possible to request the API. For example let's retrieve your projects list:
GET https://app.hiptest.com/api/projects HTTP/1.1Accept: application/vnd.api+json; version=1
access-token: your-access-token
client: your-client-id
uid: your_uid
That returns the following JSON:
{ "data": [
{
"type": "projects",
"id": "61344",
"attributes": {
"name": "Testing CASH WITHDRAWAL (sample N°2)"
},
"links": {
"self": "/projects/61344"
}
},
{
"type": "projects",
"id": "46292",
"attributes": {
"name": "Testing BOOKSTORE (sample N°1)"
},
"links": {
"self": "/projects/46292"
}
}
]
}
In addition to your API credentials please note the header Accept: application/vnd.api+json; version=1. This one is mandatory for all requests to the API.
Give it a try! Just replace the API credentials with yours, using curl:
curl --header 'Accept: application/vnd.api+json; version=1' --header 'access-token: your-access-token' --header 'client: your-client-id' --header 'uid: your_uid' https://app.hiptest.com/api/projects
or powershell:
(Invoke-WebRequest -Uri 'https://app.hiptest.com/api/projects' -Headers @{'Accept' = 'application/vnd.api+json; version=1'; 'access-token' = 'your-access-token'; 'client' = 'you-client-id'; 'uid' = 'your-uid'}).RawContent
Now that you know how to request the API to retrieve your projects, you can request for folders, scenarios, and many other things as described in Hiptest REST API documentation.
While building a dashboard you need to know the status of your test runs. Here is the API endpoint for that purpose:
GET https://app.hiptest.com/api/projects/[project_id]/test_runs HTTP/1.1Accept: application/vnd.api+json; version=1
access-token: your-access-token
client: your-client-id
uid: your_uid
That returns something like that:
{ "data": [
{
"type": "test-runs",
"id": "107423",
"attributes": {
"created-at": "2017-11-28T11:05:55.806Z",
"updated-at": "2017-11-28T11:05:56.505Z",
"last-author": "HiptestBot",
"name": "Sprint 1",
"description": "",
"statuses": {
"passed": 4,
"failed": 1,
"retest": 0,
"undefined": 0,
"blocked": 0,
"skipped": 1,
"wip": 0
}
},
"links": {
"self": "/test-runs/107423"
},
"relationships": {
"tags": {}
}
},
{
"type": "test-runs",
"id": "107422",
"attributes": {
"created-at": "2017-11-28T11:05:53.640Z",
"updated-at": "2017-11-28T11:05:55.675Z",
"last-author": "HiptestBot",
"name": "Continuous integration",
"description": "",
"statuses": {
"passed": 6,
"failed": 0,
"retest": 0,
"undefined": 0,
"blocked": 0,
"skipped": 0,
"wip": 0
}
},
"links": {
"self": "/test-runs/107422"
},
"relationships": {
"tags": {}
}
}
],
"included": []
}
Here they are! Statuses for test runs!
Try this out by replacing [project_id] with the id of one of your projects. Do not forget to use your API credentials
using curl:
curl --header 'Accept: application/vnd.api+json; version=1' --header 'access-token: your-access-token' --header 'client: your-client-id' --header 'uid: your_uid' https://app.hiptest.com/api/projects/[project_id]/test_runs
using powershell:
(Invoke-WebRequest -Uri 'https://app.hiptest.com/api/projects/[project_id]/test_runs' -Headers @{'Accept' = 'application/vnd.api+json; version=1'; 'access-token' = 'your-access-token'; 'client' = 'you-client-id'; 'uid' = 'your-uid'}).RawContent

The dashboard
Now that you know how to request the Hiptest API to get test runs statuses, you are all set to build a dashboard.
A dashboard is a control panel which collates information about your product. In a DevOps context it may display server monitoring data - CPU usage or memory consumption for example - but also the status of your CI and/or the statuses of your tests. This is what you will build: a dashboard that permanently shows the statuses of tests as reported by Hiptest to your team.
Note: the rest of this tutorial assumes that you have Ruby installed and ready to go.
Setup your dashboard with smashing
The following command lines will setup smashing, create a new project, and start it:
gem install bundlergem install smashing
smashing new hiptest-api-dashboard-tutorial
cd hiptest-api-dashboard-tutorial
bundle
smashing start
If everything worked fine, navigate to http://localhost:3030 to see a sample dashboard.
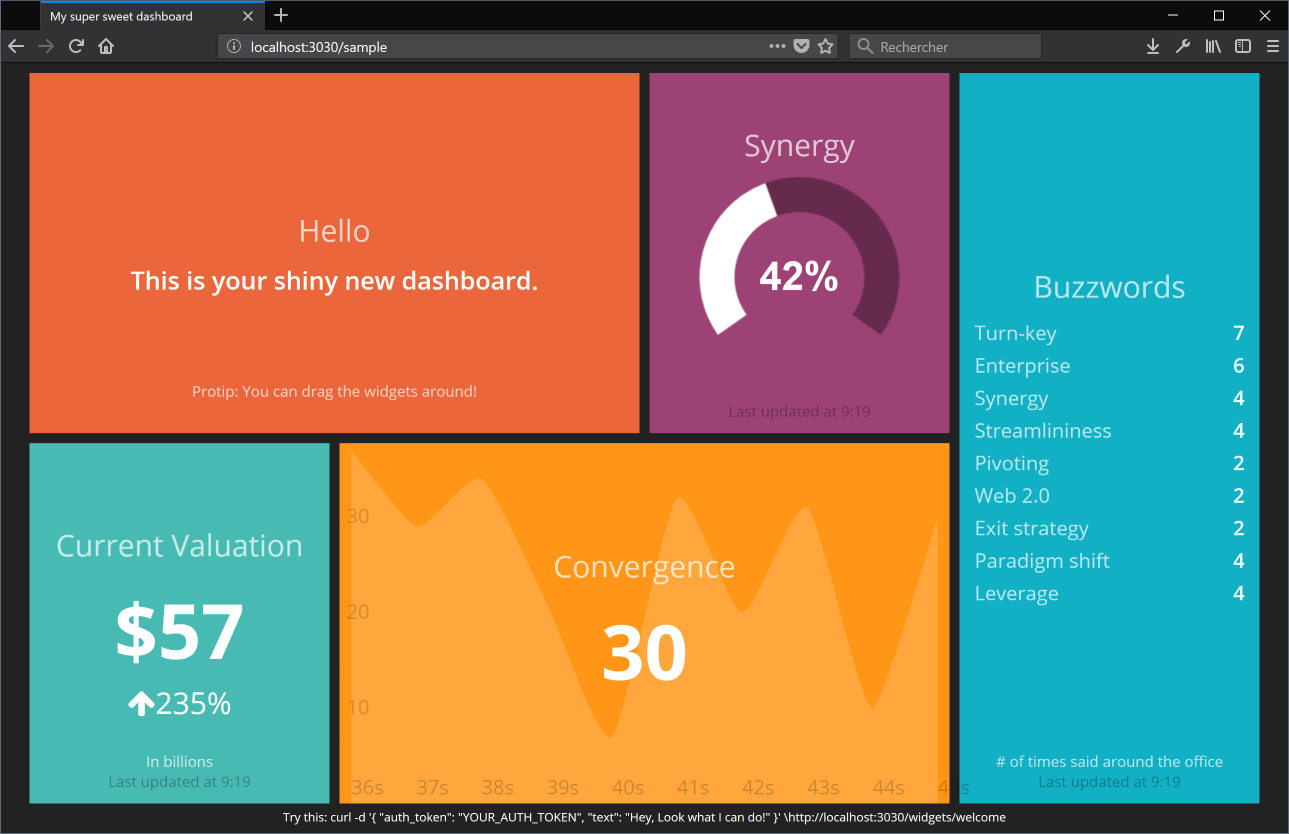
If not please consider taking a look at the GitHub repository of Smashing.
Create a dashboard for Hiptest Test runs
First create a new file in the dashboards folder named hiptest.erb with the following content:
Hiptest dashboard<div class="gridster">
<ul>
<li>
<div></div>
</li>
<li>
<div></div>
</li>
</ul>
</div>
This creates a new dashboard titled "Hiptest dashboard" with two tiles. Those tiles will be used to show the status of two test runs for the CASH WITHDRAWAL sample project. Navigate to http://localhost:3030/hiptest to see your dashboard: 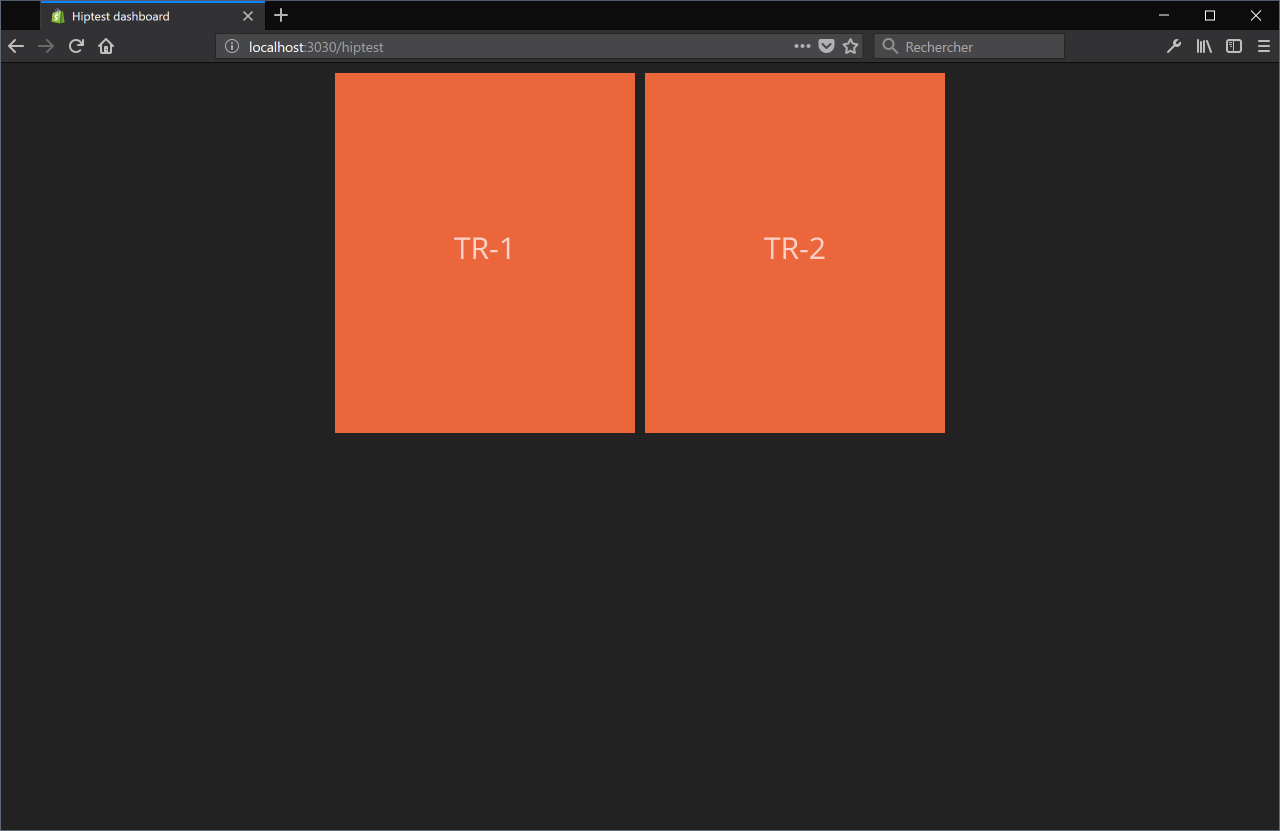 Now create another file in the
 jobs directory named hiptest.rb with the following content:
require 'net/http'require 'json'
# Set the following constants with your data
PROJECT_ID = 0
ACCESS_TOKEN = 'your-access-token'
CLIENT_ID = 'your-client-id'
UID = 'your-uid'
PROJECT_URL = "https://app.hiptest.com/api/projects/#{PROJECT_ID}/test_runs"
# That method will actually fetch the data from Hiptest
# and return an array of hashes containing test runs names and statuses
def request_hiptest_status
uri = URI(PROJECT_URL)
result = Net::HTTP.start(uri.host, uri.port, use_ssl: uri.scheme == 'https') do |http|
request = Net::HTTP::Get.new uri
request['Accept'] = "application/vnd.api+json; version=1"
request['access-token'] = ACCESS_TOKEN
request['client'] = CLIENT_ID
request['uid'] = UID
http.request request
end
if result and result.is_a?(Net::HTTPOK)
response = JSON.parse(result.body)
# To return an array containing only names and statusese of test runs
return response['data'].collect do |test_run|
{
'name' => test_run['attributes']['name'],
'statuses' => test_run['attributes']['statuses']
}
end
end
# If something wrong happened then tiles won't be refreshed.
puts 'An error occurred.'
puts result
end
# This method is in charge of returning the most
# valuable status for the given statuses.
#
# It's up to you to define here which status you want your
# dashboard to show depending the statuses of a test run
def get_status_text(statuses)
return "Failed" if statuses['failed'] > 0
return "Blocked" if statuses['blocked'] > 0
return "Skipped" if statuses['skipped'] > 0
return "Work in progress" if statuses['wip'] > 0 || statuses['undefined'] > 0
return "Retest" if statuses['retest'] > 0
return "Passed" if statuses['passed'] > 0
return "Unknown"
end
# This will simply concatenate the statuses
# into a single string
def get_status_details(statuses)
return statuses.map { |key, value|
"#{key}: #{value}" if value > 0
}.join(' ')
end
# Every 30 seconds the dashboard will fetch statuses from Hiptest
# then refresh the tiles accordingly
SCHEDULER.every '30s' do
test_runs = request_hiptest_status
if test_runs
send_event('tr-1',
title: test_runs.first['name'],
text: get_status_text(test_runs.first['statuses']),
moreinfo: get_status_details(test_runs.first['statuses']))
send_event('tr-2',
title: test_runs.last['name'],
text: get_status_text(test_runs.last['statuses']),
moreinfo: get_status_details(test_runs.last['statuses']))
end
end
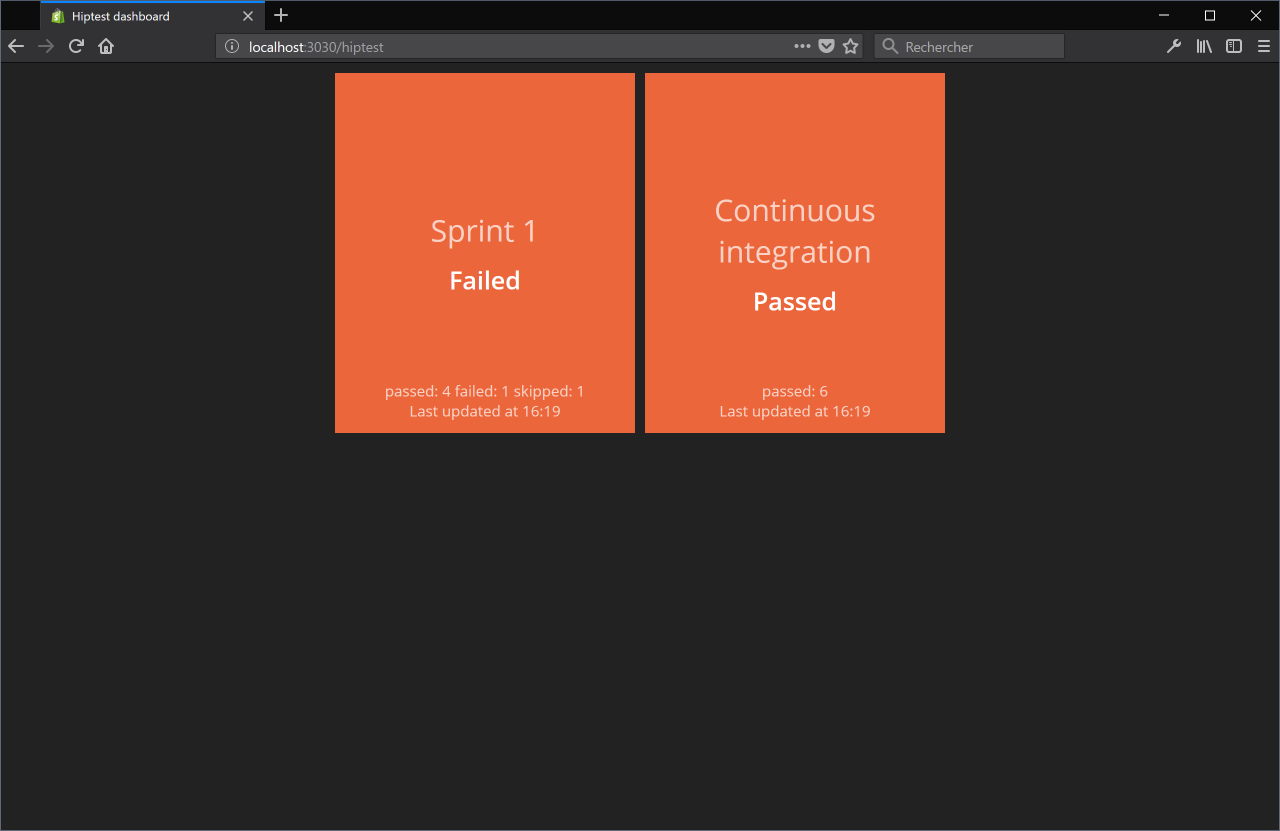
This code requests the API for test runs statuses then refreshes the tiles accordingly.
If you stop the dashboard, start it again, and wait for the tiles to be refreshed, they will look like this:
Add some colors to the dashboard
The dashboard would be more informative with different colors for each status. To do so a new widget must be created. Create a new directory in the widgets folder named status and, within it, create a new file status.html with that content:
<h1 class="title"></h1><h3></h3>
Create a file status.scss with that content:
// ----------------------------------------------------------------------------// Sass declarations
// ----------------------------------------------------------------------------
$passed-color: #2ECC9A;
$failed-color: #DF182A;
$wip-color: #FFC300;
$blocked-color: #8B0000;
$retest-color: #FF7603;
$skipped-color: #455982;
$background-color: #8A8A8A;
$title-color: rgba(255, 255, 255, 0.7);
$moreinfo-color: rgba(255, 255, 255, 0.7);
// ----------------------------------------------------------------------------
// Widget-status styles
// ----------------------------------------------------------------------------
.widget-status {
background-color: $background-color;
.title {
color: $title-color;
}
.more-info {
color: $moreinfo-color;
}
.updated-at {
color: rgba(255, 255, 255, 0.7);
}
&.large h3 {
font-size: 65px;
}
&.status-passed {
background-color: $passed-color;
}
&.status-failed {
background-color: $failed-color;
}
&.status-wip {
background-color: $wip-color;
}
&.status-blocked {
background-color: $blocked-color;
}
&.status-retest {
background-color: $retest-color;
}
&.status-skipped {
background-color: $skipped-color;
}
}
And a file status.coffee with that content:
class Dashing.Status extends Dashing.Widget onData: (data) ->
if data.text
className = ""
switch data.text.toLowerCase()
when "passed" then className = "passed"
when "failed" then className = "failed"
when "work in progress" then className = "wip"
when "blocked" then className = "blocked"
when "retest" then className = "retest"
when "skipped" then className = "skipped"
$(@get('node')).attr 'class', (i, c) ->
c.replace /\bstatus-\$+/g, ''
$(@get('node')).addClass "status-#{className}"
Finally update dashboards/hiptest.erb to use the new Status widget instead of the Text one:
Hiptest dashboard<div class="gridster">
<ul>
<li>
<div></div></li>
<li>
<div></div></li>
</ul>
</div>
Restart your dashboard and refresh your browser to get your shiny dashboard:
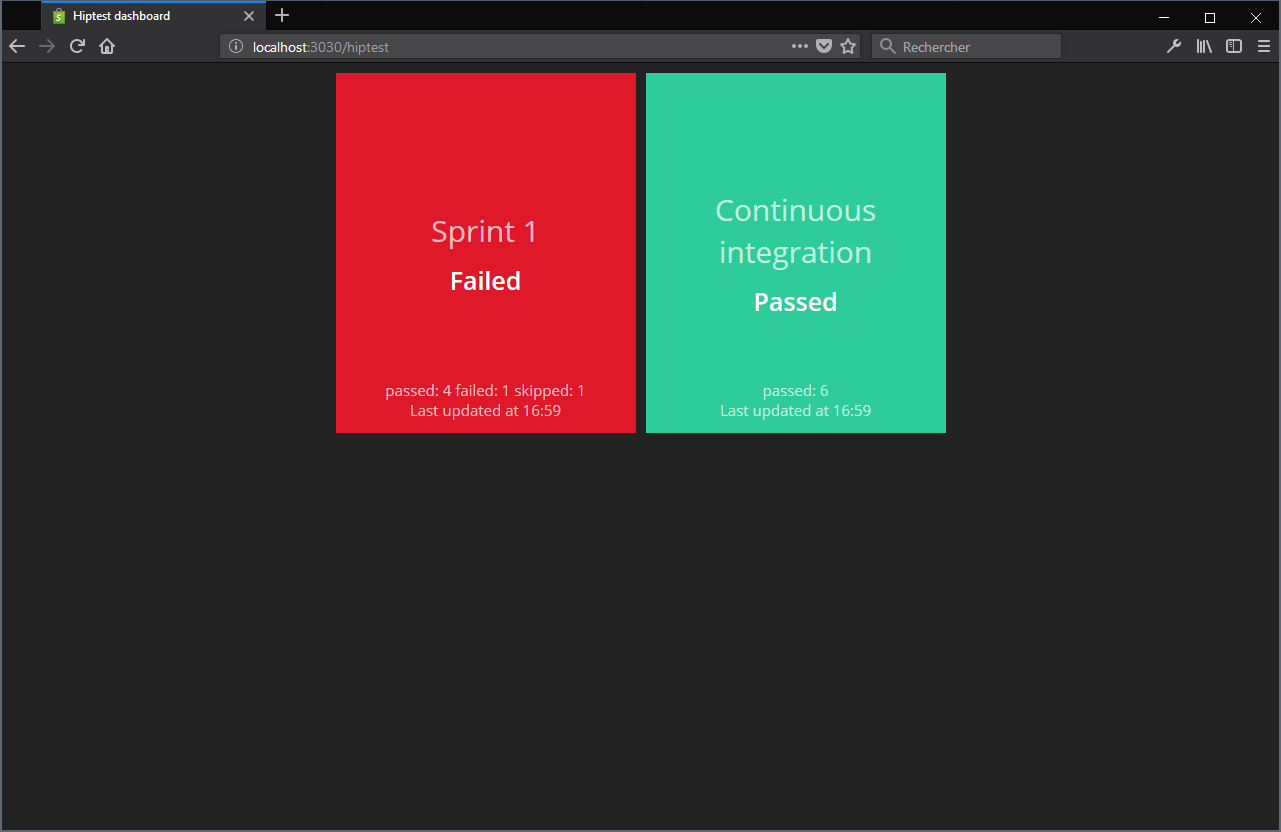
That's it! Your dashboard now shows you the statuses of your test runs!
Final words and conclusion
You can retrieve the source code of the dashboard on GitHub: https://github.com/hiptest/api-dashboard-tutorial.
Hiptest API may help you to do much more than reporting statuses of your test runs on a dashboard. All endpoints are listed in the API documentation. Share with us your Hiptest API usage on Hiptest User Group!
You can also take a look on our Trello Backlog to see what is planned to be done in the coming months. If something seems to be missing for you, feel free to send us a feature request, still on Hiptest User Group ;)