In the previous blog post, we have seen how handlebars works and the various helpers provided by Hiptest publisher.
It is now time to have a look at some examples and tweak the default output. But first, let's do some configuration so hiptest-publisher knows which templates to use.
Configuring hiptest-publisher
First, create a folder named "templates" in your code repository (the naming is not important).
Then, edit your hiptest-configuration file and add the following line:
overriden_templates = './templates'
And now we are ready to go. To simplify the explanations, we'll use some real-life use cases given by our customers.
Example 1: changing the parameters casing
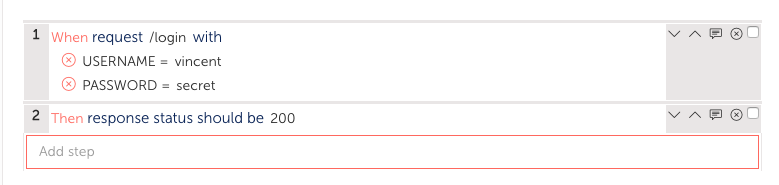
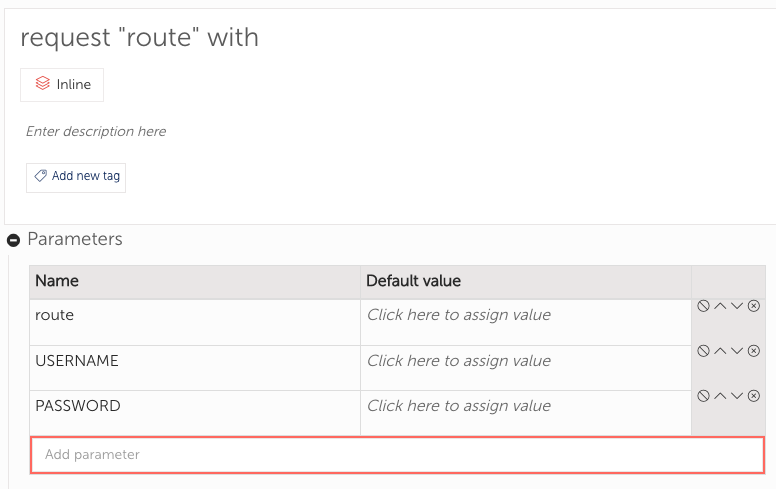
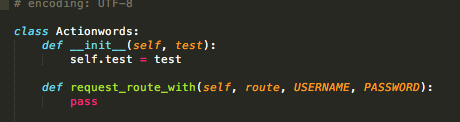
Let's say you are testing a web service with Python and you need your parameters to keep the casing for the parameters as it helps implementing the action words.
Here is how you wrote it in Hiptest:
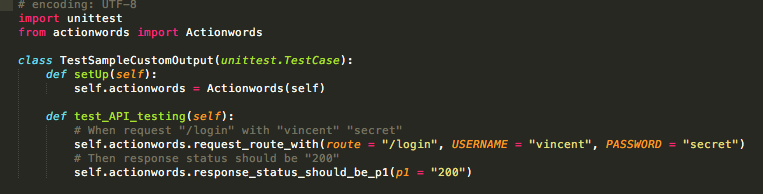
Now, when you generate the code, you obtain this code:

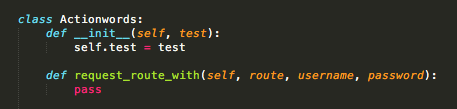
As you can see, the parameters have been changed with snake case and the capitalisation has been lost (as snake case is the norm in Python).
We will fix this easily. First, open the Github project for hiptest-publisher and navigate to the python templates (located in lib/templates/python) and copy the files "argument.hbs" and "parameter.hbs" to the "templates" folder you created previously.
As you can see in those two files, we are calling the "underscore" helper when rendering the name of the parameter and arguments. We'll replace that with the "literate" helper and regenerate the code with hiptest-publisher:
Example 2: adding a setup for the tests
Hiptest can handle setup for tests by the use of action words, but you may want to customise it a bit for your use case. A classical case would be to add a setup that starts a Selenium browser (that would not help readability of test having an action word called "start Selenium browser").
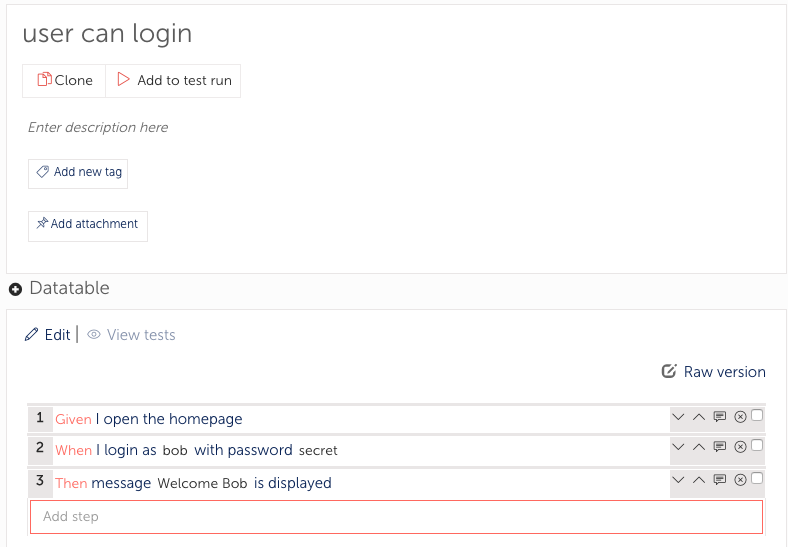
Here is our folder setup and one test scenario we want to implement.

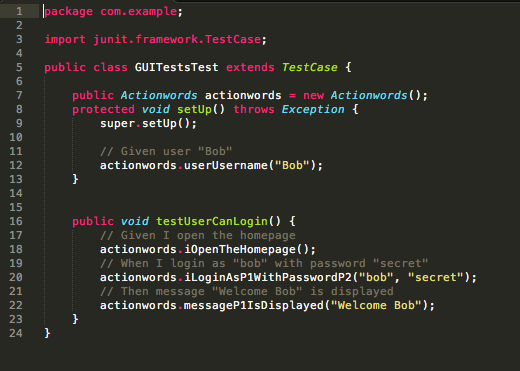
Once we generate the code, we obtain this for our folder:
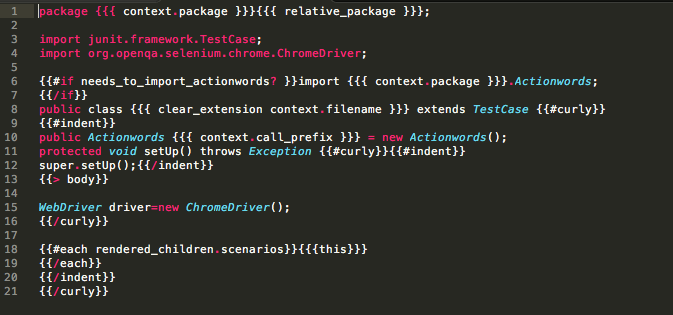
In Github, we'll open the templates for Java generation, located in "lib/templates/java" we'll copy the file "folder.hbs" to our templates directory.
We can see there that there is already a setup defined, but it only outputs data if a setup has been set at the folder level. So first thing, we'll remove the "{{#unless is_empty?}}" at the beginning of line 9 and the "{{/unless}}" at line 14, so a setup fonction is always declared.
Then, before closing the setup fonction, we create the web driver. Our template now looks like this:
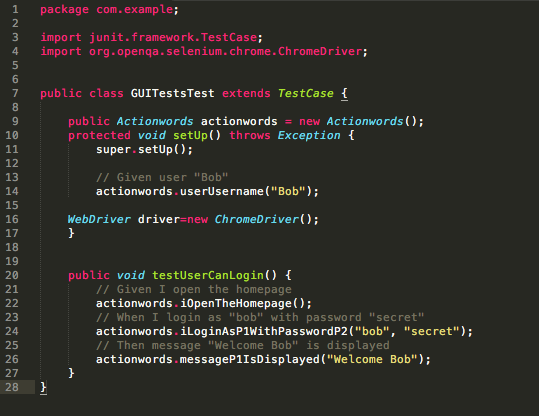
Now when we generate the code, we obtain the following code for the folder:

Example 3: adding a teardown
This one is pretty close to the previous one as we will edit the way a folder is generated. We'll use Javascript and Jasmine this time (but keep the same project than in the previous sample).
Once again, we'll find the template used to generate a folder for this framework: it is located in "lib/templates/javascript/jasmine". This time, we'll reset the application after each test.
The overriden templates looks like this:
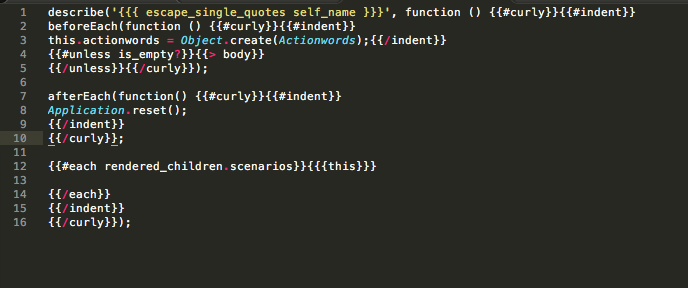
As you can see, we used the "curly" and "indent" helpers to generate the curly brackets and indent the code inside the setup.
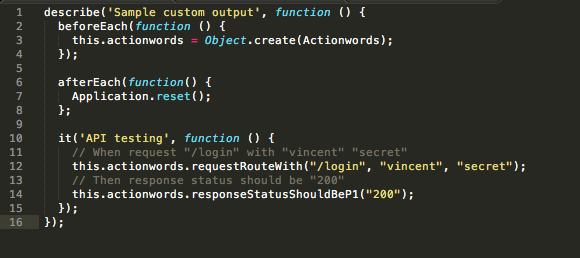
Our generated code looks like this now:
Example 4: changing default rule in Espresso
For the espresso export, we define the tested rule has being the MainActivity. That said, you may want to change which activity is tested.
This is pretty simple to change, but we first need to know which template to override. If you use the option "--with-folders" (or with_folder=true in your config file), then you need to override the folder.hbs file. Otherwise, override the scenarios.hbs file.
There, simple modify the following lines in order to have it pointing to the activity you want to test.
@Rulepublic ActivityTestRule<MainActivity> mActivityRule = new ActivityTestRule<>(MainActivity.class);
Example 5: changing keywords file name in Robot framework
By default, we generate the keywords in a file named "keywords.txt", but you may want to change that (for example split them in various helper files).
As for the previous example, you need to know which template to override: folder.hbs when splitting by folder, scenarios.hbs when generating all scenarios in a single file or single_scenario.hbs when splitting each scenario in a single file.
In the template, locate the line "Resource keywords.txt" and replace it by the name of the ressource you need, for example:
Resource authentication.robotResource cart_management.robot
Resource payement.robot
As you can see with those different examples, it is pretty simple to change the output of Hiptest publisher so it fits your needs.
In case you do not know which template to override, you can always ask the Hiptest support to guide you through the customising process.
Happy testing :)